# PoliceBook - Administration
An administration guide for the application PoliceBook.
E.g., How to create users, how to audit, how to install PoliceBook.
# Updating registration details
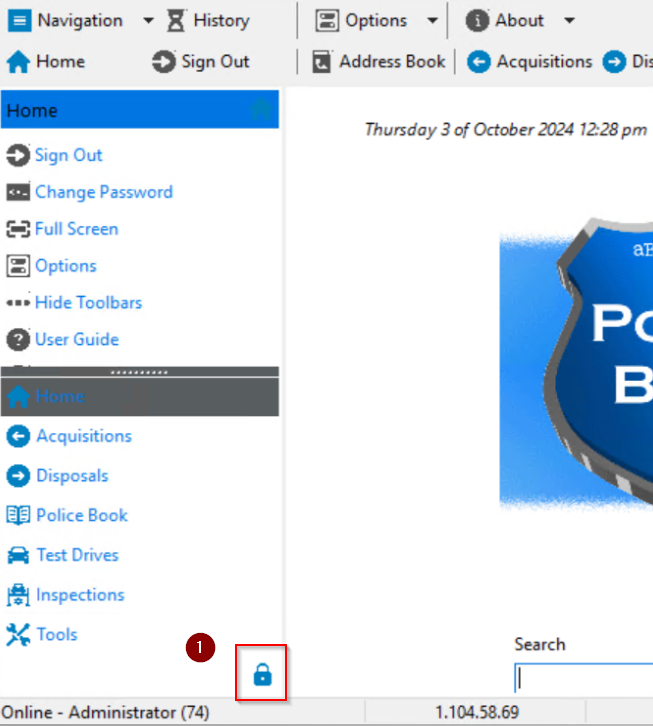
Login as an administrator user
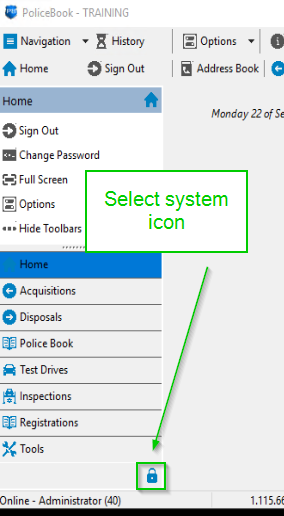
Select the system menu (or padlock)
[](https://help.abitsystems.com.au/uploads/images/gallery/2024-10/blDimage.png)
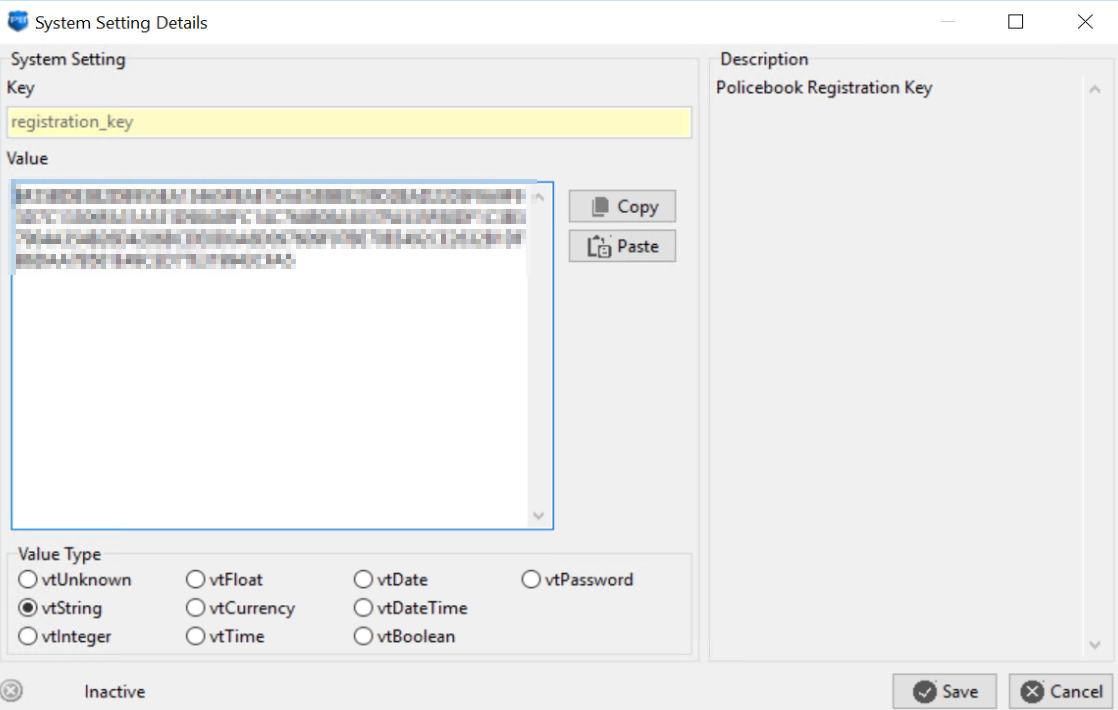
Navigation to System and search settings for "registration\_", edit the entry
[](https://help.abitsystems.com.au/uploads/images/gallery/2024-10/epSimage.png)
Enter the new key and press save
[](https://help.abitsystems.com.au/uploads/images/gallery/2024-10/evOimage.png)
# Zero config / Auto Discover
See this guide for detailed setup of [Zero config](https://help.abitsystems.com.au/books/zero-config "Zero config")
# User administation
Select administration area
[](https://help.abitsystems.com.au/uploads/images/gallery/2025-09/MBsimage.png)
### Local user accounts
#### Creating a new staff member
Start the new staff wizard, enter required information if the user is required to login check the "Allow login" box
[](https://help.abitsystems.com.au/uploads/images/gallery/2025-09/7Xvimage.png)
You can use the generate password button to create a password
[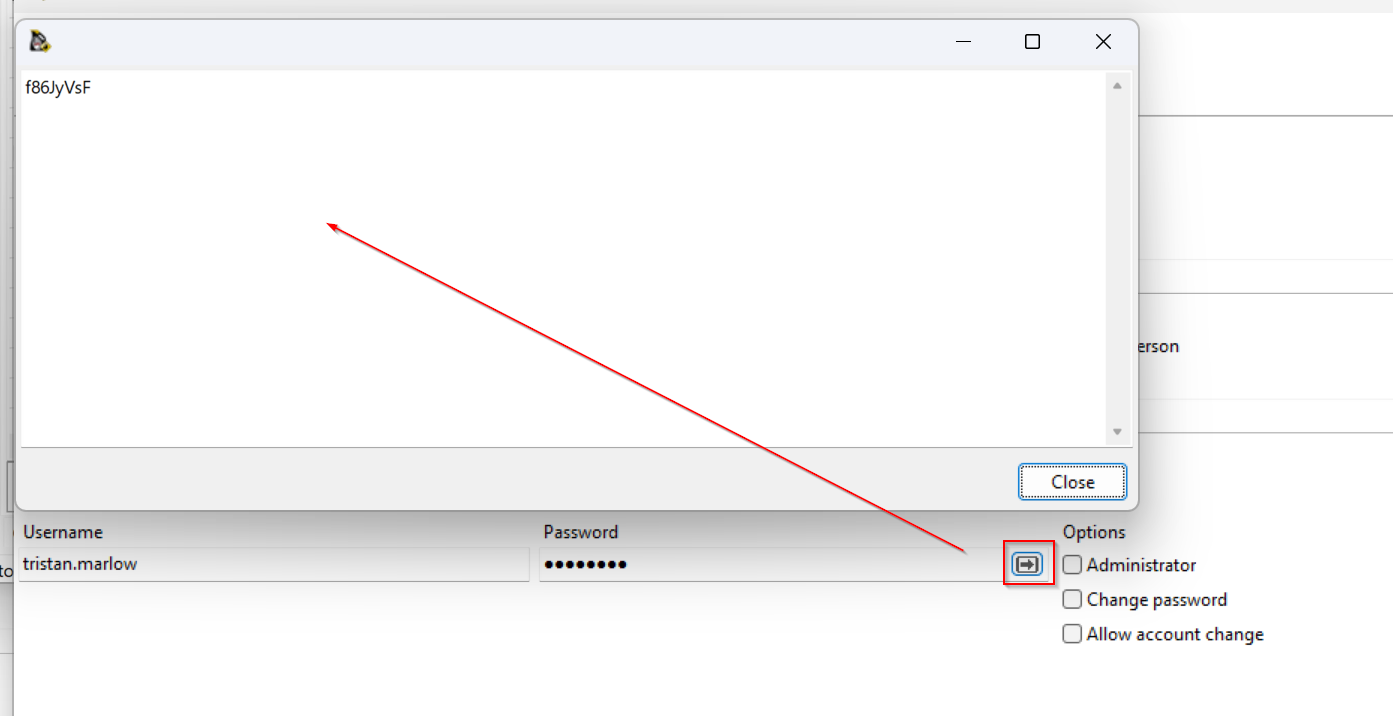](https://help.abitsystems.com.au/uploads/images/gallery/2024-08/6pHimage.png)
Service scheduler will check for a similar name to ensure that the user
[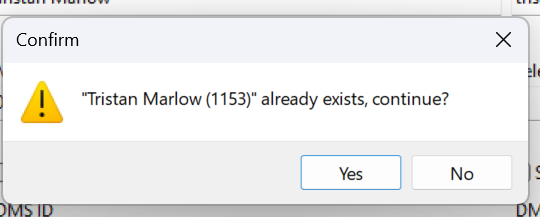](https://help.abitsystems.com.au/uploads/images/gallery/2024-08/EYzimage.png)
#### Edit existing staff member
To find a staff member that has had their account disabled. Select the following button
[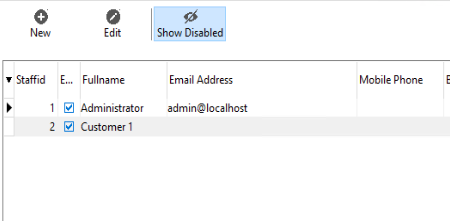](https://help.abitsystems.com.au/uploads/images/gallery/2025-09/7RWimage.png)
Adjust user details as required
[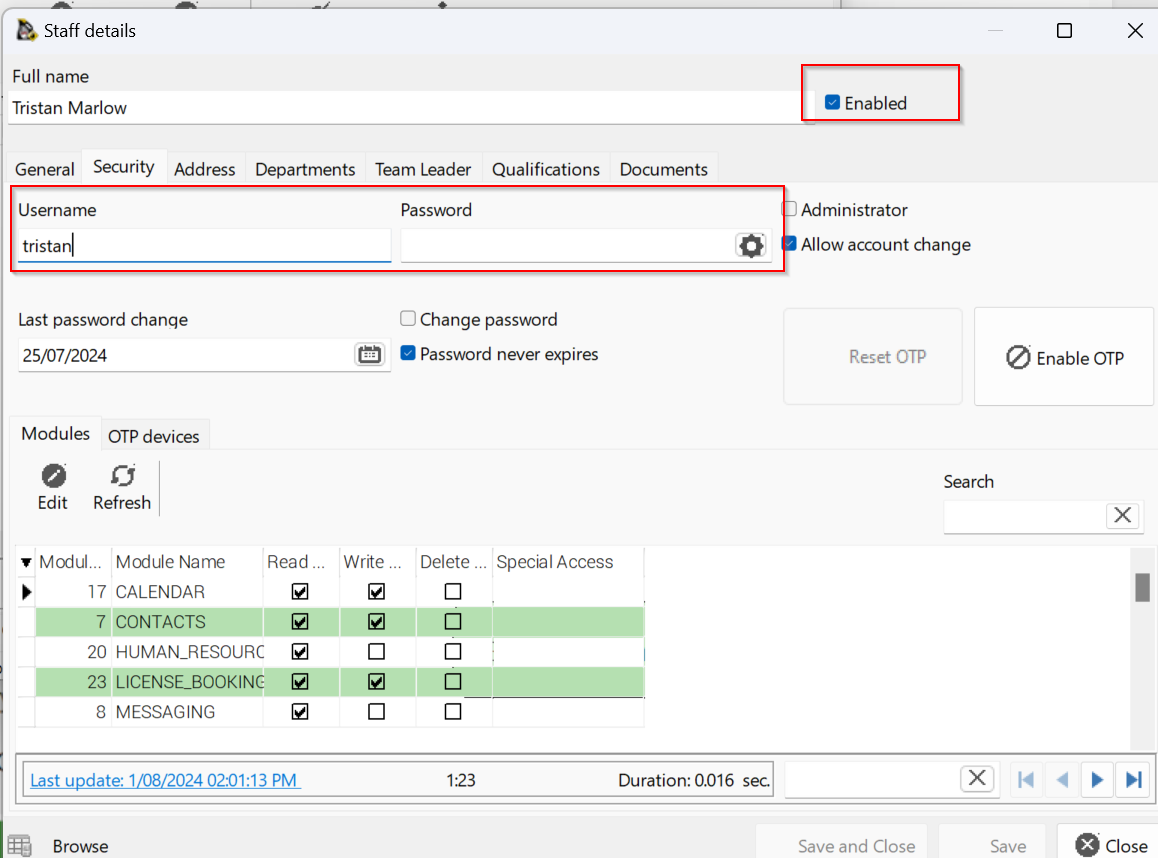](https://help.abitsystems.com.au/uploads/images/gallery/2024-08/CEJimage.png)
### LDAP Integration (Active Directory)
To enable LDAP integration, navigate to system settings and search for "ldap"
[](https://help.abitsystems.com.au/uploads/images/gallery/2025-09/AI2image.png)
| ldap\_allow\_company | This will look at the users "company" and if matches will allow login/ Blank will allow any company value. |
| ldap\_allow\_departments | This will look at group the user is a member of and if they match a group name |
| ldap\_domain | Your LDAP / Active Directory domain name |
| ldap\_server\_hostname | The domain will be used to find a server via DNS but a specific server can be specified. |
| ldap\_server\_port | Port to communicate for LDAP requests |
Departments / Active Directory groups are the recommended method of controller
[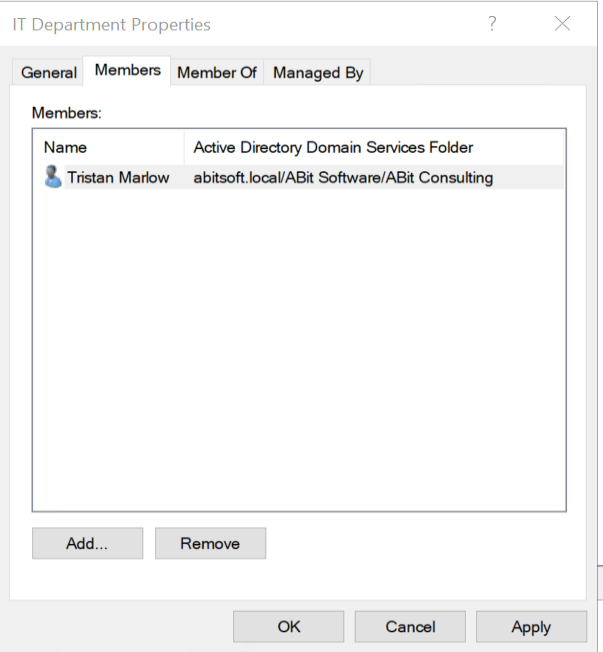](https://help.abitsystems.com.au/uploads/images/gallery/2024-08/Mzhimage.png)
As the password is controlled by LDAP, attempting to change the password will result in "User passwords are managed by LDAP integration"
[](https://wiki.abitsystems.com.au/uploads/images/gallery/2024-07/Blt3uX71JGk4xrDd-image.png)
# Policebook - Installation
The **User setup** does not require Administrative rights to install, but means only the user that installed the program can use it. There is a **System setup** available, but requires Administrative rights to install. You will be able to find these options on your PoliceBook software home page. The **User setup** is the **recommended** version.
1\. Click "**Next**" if you want to continue with the set-up, else click "**Cancel**", and the PoliceBook installer will close.
[](https://help.abitsystems.com.au/uploads/images/gallery/2025-11/d9Dimage.png)
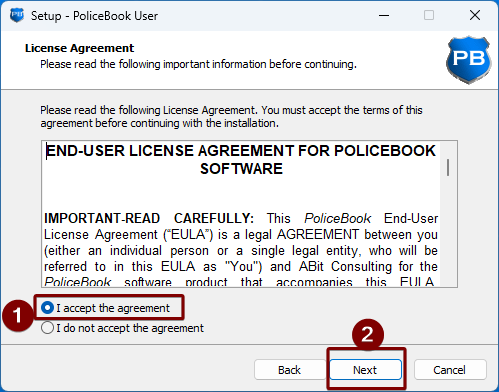
2\. Please read the license agreement before continuing, then click **Next**. You will not be able to continue without accepting the EULA.
[](https://help.abitsystems.com.au/uploads/images/gallery/2025-11/N75image.png)
3\. Please read the release notes if you are reinstalling the program, then click **Next**.
[](https://help.abitsystems.com.au/uploads/images/gallery/2025-11/774image.png)
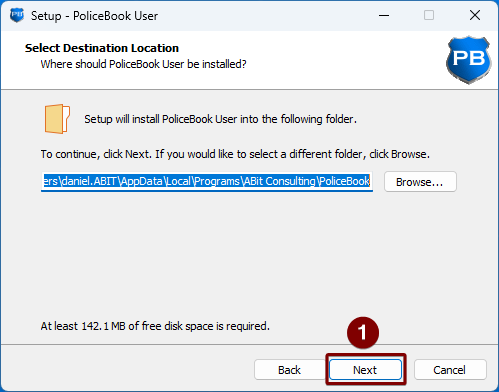
4\. Please select a location to where you want PoliceBook to be installed to on your computer, or you can leave as default. Once finished, click **Next**.
[](https://help.abitsystems.com.au/uploads/images/gallery/2025-11/4rKimage.png)
5\. Please choose a Start Menu shortcut folder, or if you would like for the program shortcut in the Start Menu to be under "P", click "Don't create a Start Menu folder", then click **Next**.
[](https://help.abitsystems.com.au/uploads/images/gallery/2025-11/CMuimage.png)
6\. If you would like the installer to not create a Desktop shortcut, please uncheck the box and click **Next**.
[](https://help.abitsystems.com.au/uploads/images/gallery/2025-11/0q4image.png)
7\. Once you are happy with the installation, click **Install**.
[](https://help.abitsystems.com.au/uploads/images/gallery/2025-11/0H2image.png)
8\. Once the installation is finished, you are now ready to open PoliceBook. Click **Finish**.
[](https://help.abitsystems.com.au/uploads/images/gallery/2025-11/XM8image.png)
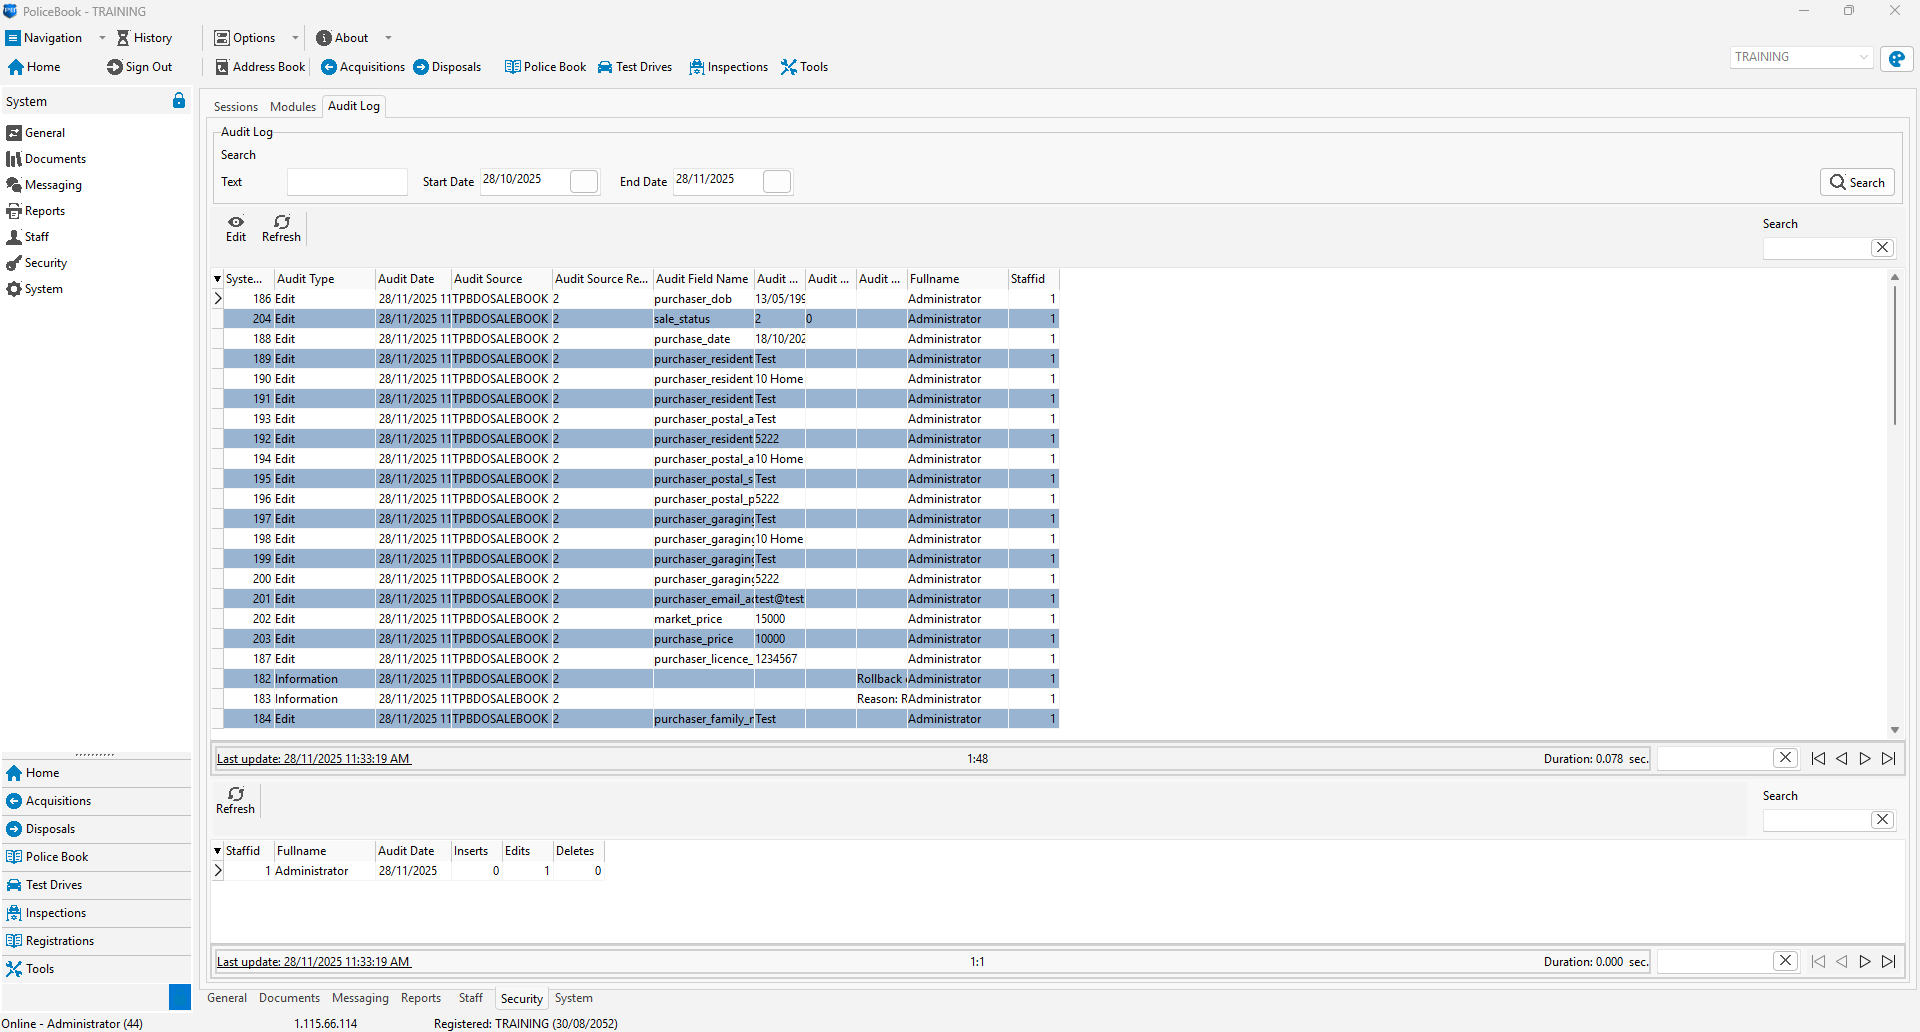
# Audit Log
There is an Audit log to see who edited what at what time. You can access this Audit log from System > Security > Audit Log.
[](https://help.abitsystems.com.au/uploads/images/gallery/2025-11/9pvimage.png)