The **User setup** does not require Administrative rights to install, but means only the user that installed the program can use it. There is a **System setup** available, but requires Administrative rights to install. You will be able to find these options on your Service Scheduler software home page. The **User setup** is the **recommended** version.
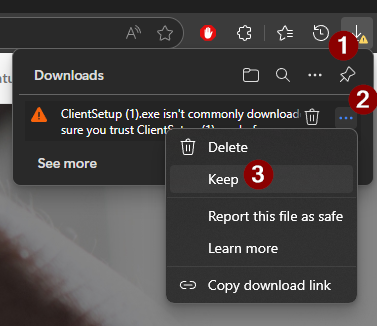
### Download client The client is available on the from the running server instance of service scheduler. (eg [http://servsched:8090](http://servsched:8090/)) The default Server Port: 8090 however this could be changed during installation. [](https://wiki.abitsystems.com.au/uploads/images/gallery/2024-06/69sxo8qagcg5EIDa-image.png)| Client - User Setup | This will install the application in the user current profile. Admin rights are not require |
| Client - User Setup (System Wide) | This will install a stub in the program files folder and a desktop icon for all users. This will then install the application in users profile. This is helpful for workstations used by multiple users |
| Client - System Setup | This will install in Program files for all users. Requires admin rights. |
| [](https://help.abitsystems.com.au/uploads/images/gallery/2025-09/h6bimage.png) | [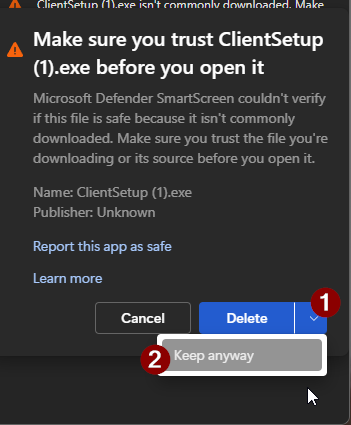](https://help.abitsystems.com.au/uploads/images/gallery/2025-09/qvgimage.png) |
If a URL was provided for installation (eg [http://172.16.1.10:8090](http://172.16.1.10:8090)) the address would 172.16.1.10.
[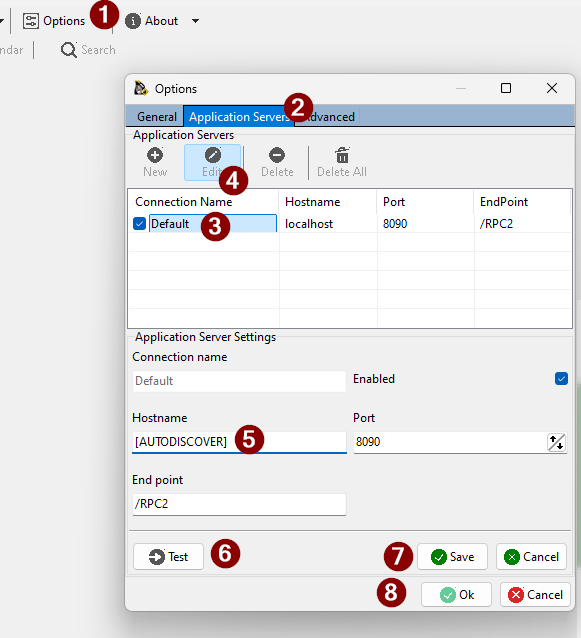](https://help.abitsystems.com.au/uploads/images/gallery/2025-09/X76image.png) Press Sign in again [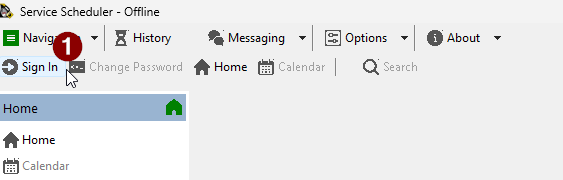](https://help.abitsystems.com.au/uploads/images/gallery/2025-09/Jmkimage.png) # Mobile client installation Service Scheduler mobile requires that Web Services are installed and accessible from customer WAN - \[Android\] ([https://play.google.com/store/apps/details?id=au.com.abitsoftware.servsched](https://play.google.com/store/apps/details?id=au.com.abitsoftware.servsched)) - \[iOS\] ([https://itunes.apple.com/us/app/service-scheduler/id898640065?ls=1&mt=8)](https://itunes.apple.com/us/app/service-scheduler/id898640065?ls=1&mt=8)) # Application server settings The default setting for the application server in Service Scheduler is \[AUTODISCOVER\] this will attempt to find the server user DNS SRV records. If DNS is not configured or testing connectivity issues, the hostname can be adjusted. [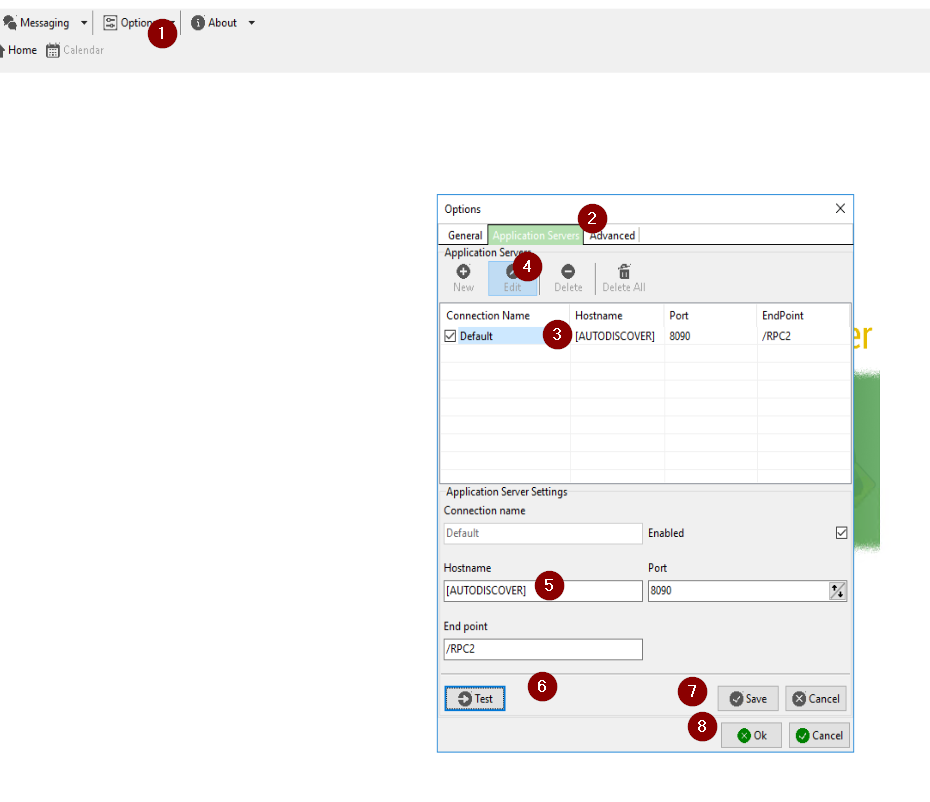](https://help.abitsystems.com.au/uploads/images/gallery/2024-07/ghXimage.png)NOTE: DNS is the recommended method with the next preference being a hostname (eg servsched) this makes future upgrades or migrations to new servers easier.
# Starting and Logging into Service Scheduler ### Starting Service Scheduler To start Service Scheduler, you have the following options: 1\. Use the provided desktop shortcut on your computer to start Service Scheduler. 2\. Go into the Start Menu and find the Service Scheduler program under the "S" section. 3\. Search "Service Scheduler" in the Search Box. [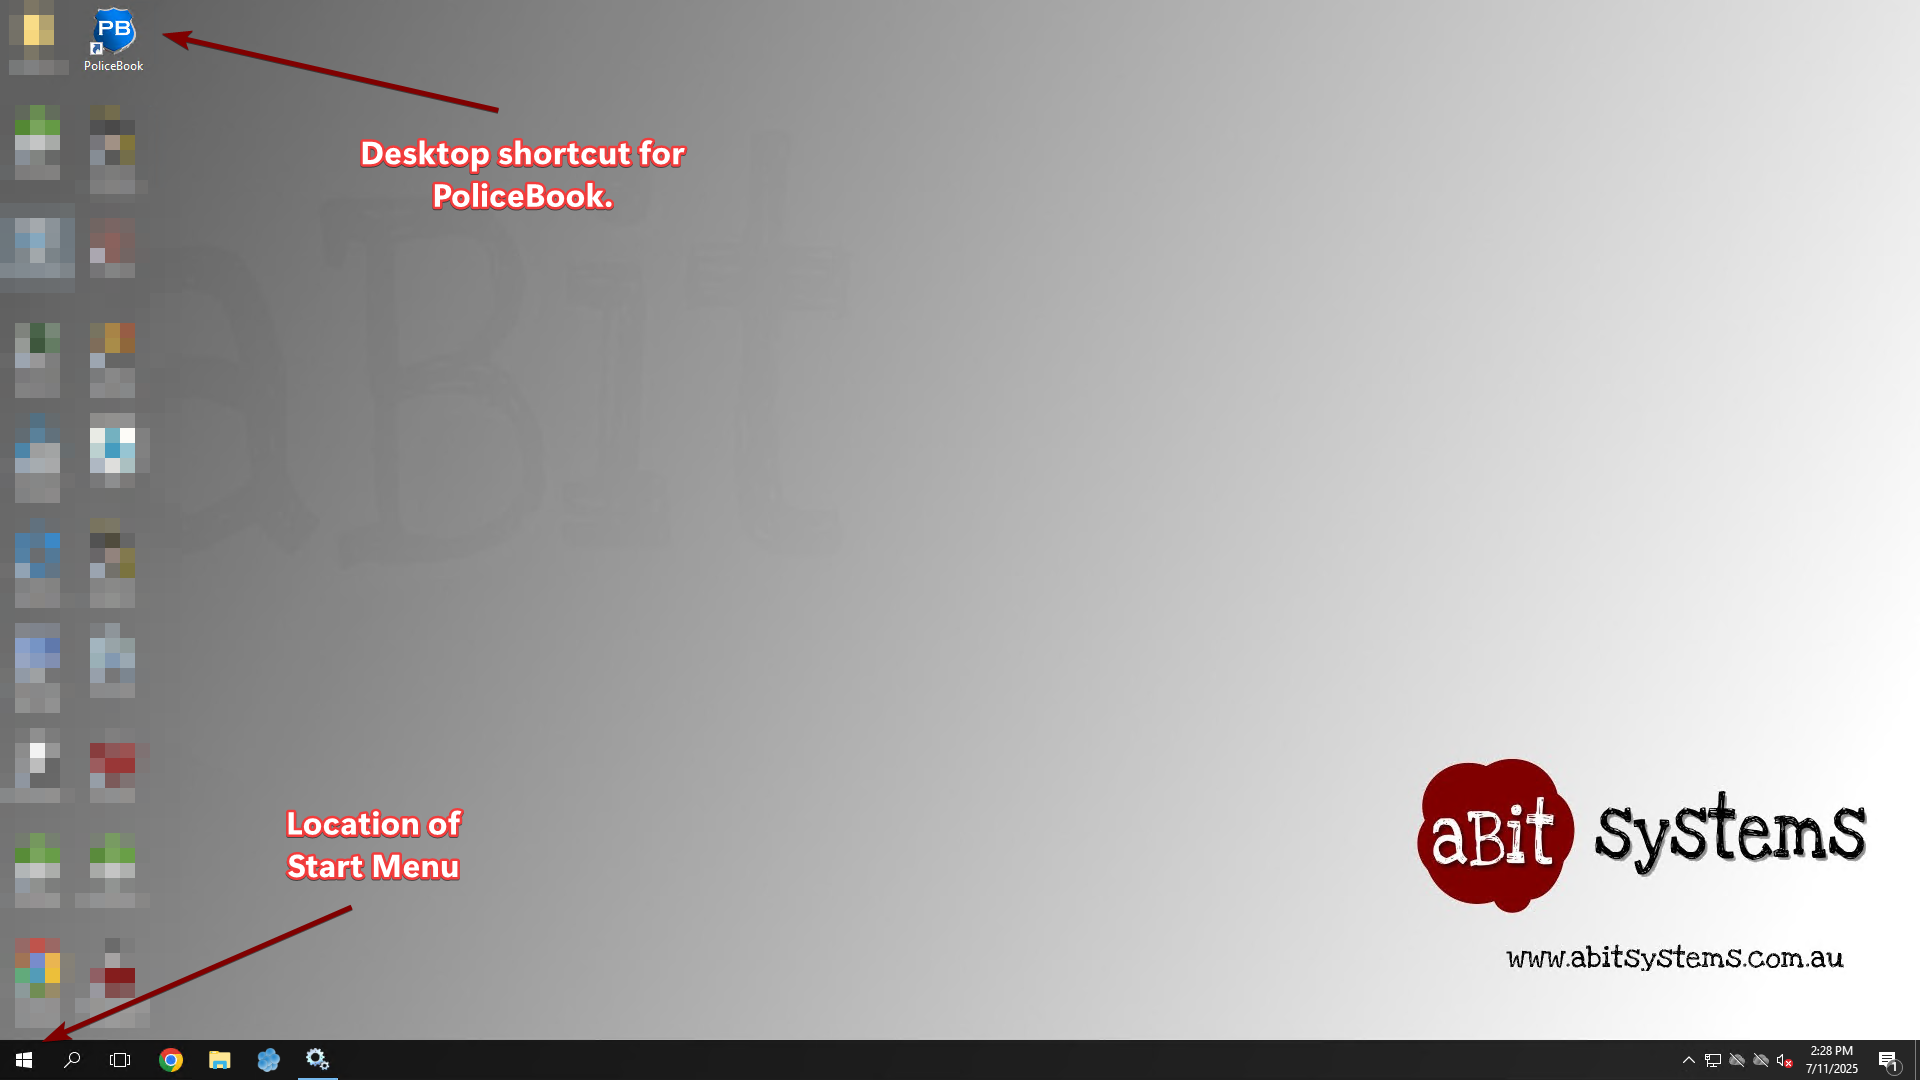](https://help.abitsystems.com.au/uploads/images/gallery/2025-11/VdSimage.png) --- ### Logging into Service Scheduler When you start Service Scheduler, you will be shown a pop-up window to log into the application. Your Service Scheduler **username** and **password** is provided by your IT support. The **account** section will only appear if you are a part of multiple accounts for your Policebook site. Please pick the account that is best suited for your current use. You can switch between accounts once you have signed into the application. [](https://help.abitsystems.com.au/uploads/images/gallery/2025-12/image.png) If you closed the pop-up, you can still sign in by pressing the 2 buttons at the top-left of the screen called "**Sign In**". [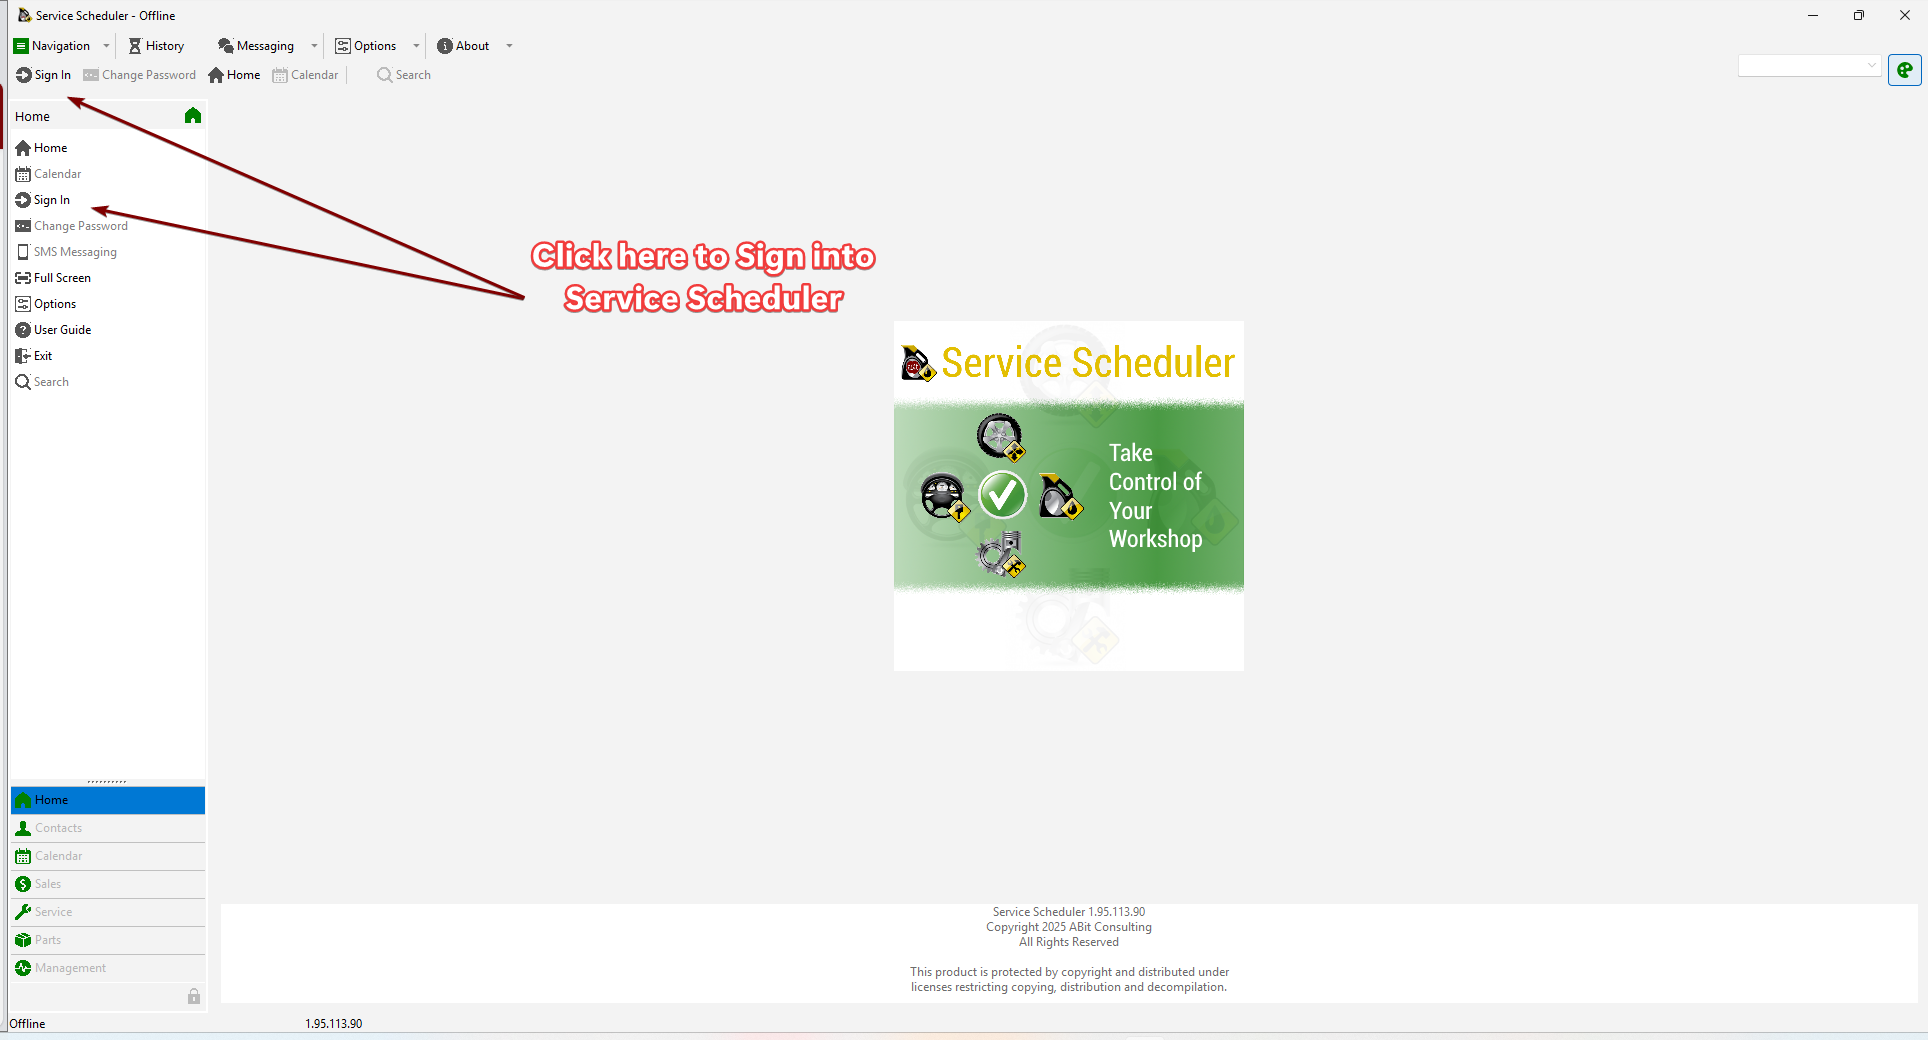](https://help.abitsystems.com.au/uploads/images/gallery/2025-12/0Lvimage.png) After a successful sign-in, you will be greeted by the front page of Service Scheduler. You will be able to see the current account at the top-right corner of the application, with a greeting message below showing who is signed into the application currently. To sign out, you can go to the left sidebar or the top bar. [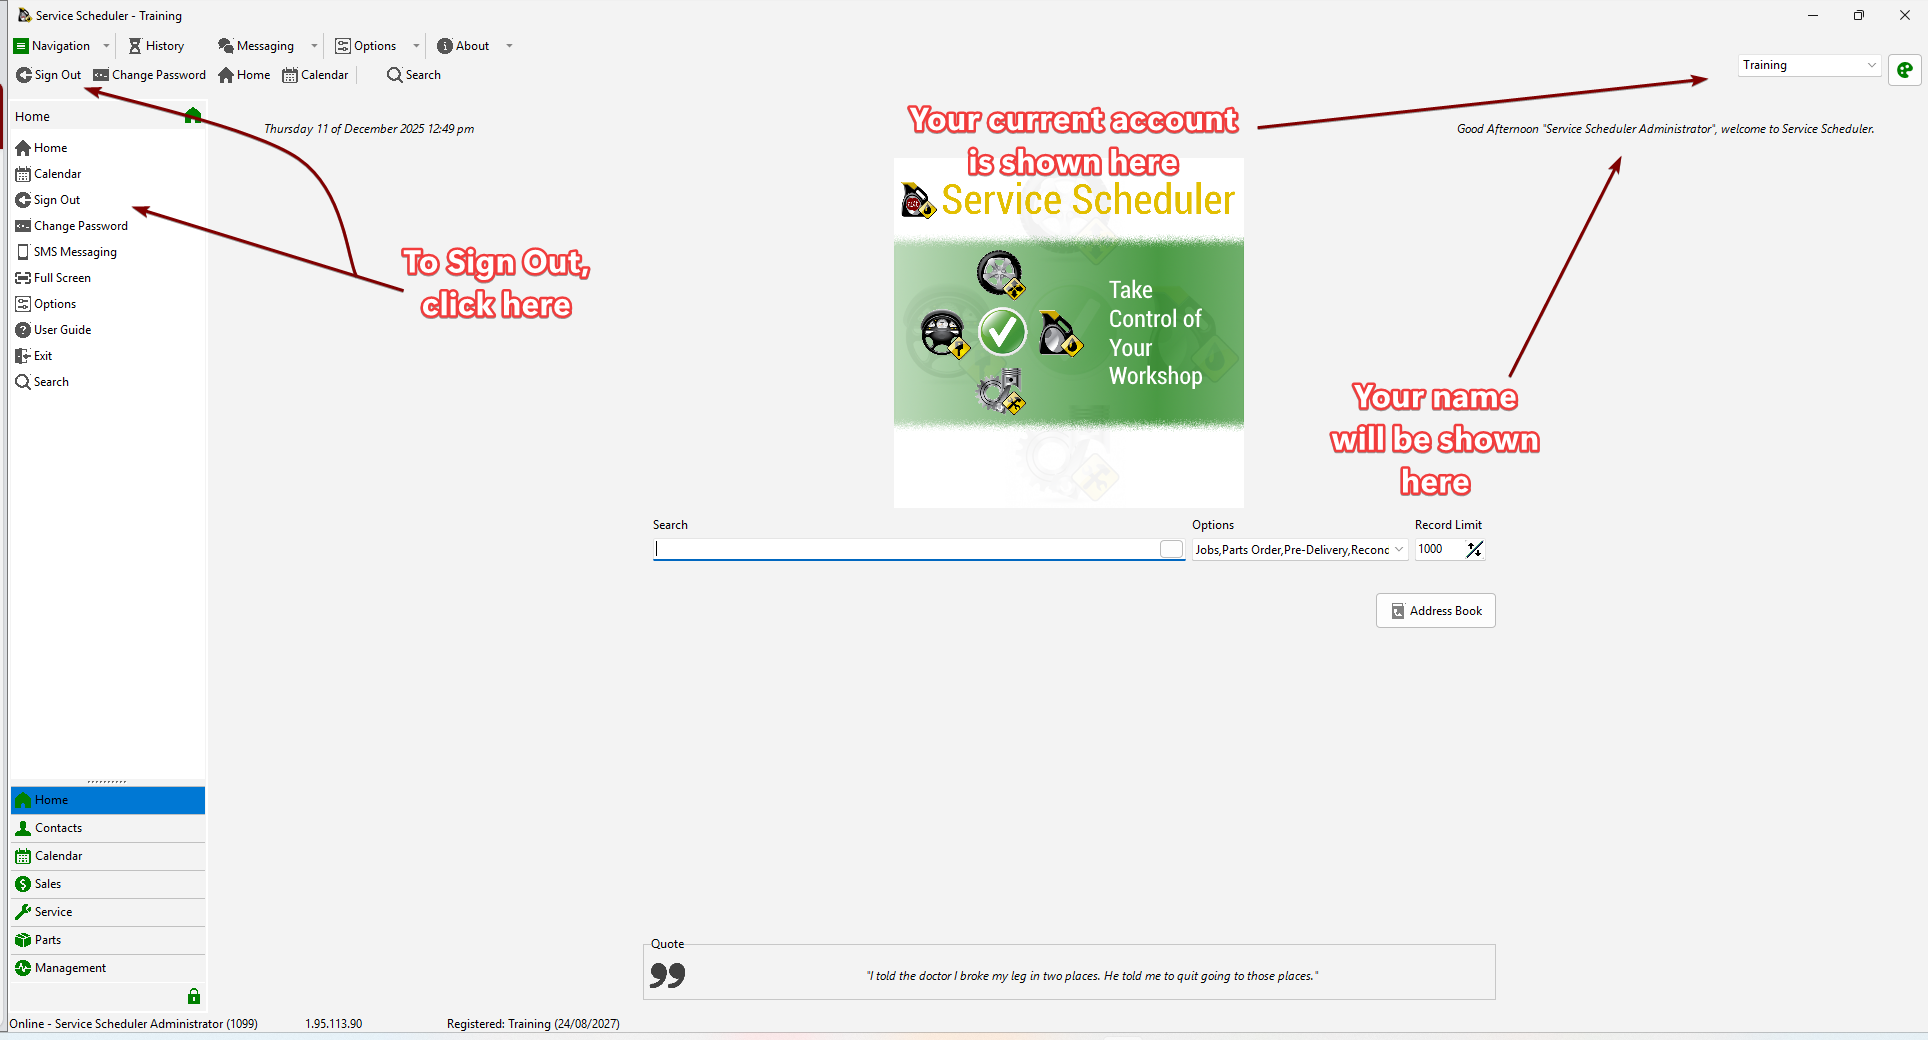](https://help.abitsystems.com.au/uploads/images/gallery/2025-12/2PCimage.png) # Loan car diary # Creating, editing and deleting entries To access the loan car diary select Service -> Loan cars [](https://help.abitsystems.com.au/uploads/images/gallery/2024-07/5Saimage.png) ### New entry Double click on desired date and available vehicle. If the vehicle is password protected enter the required password. [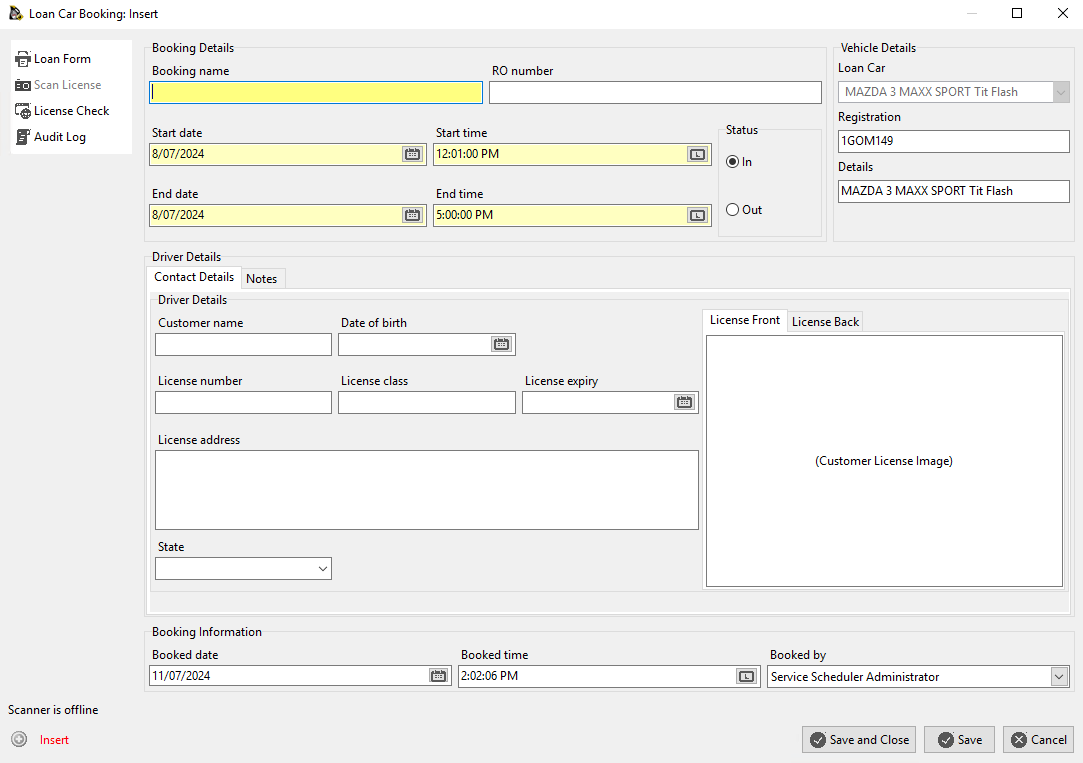](https://help.abitsystems.com.au/uploads/images/gallery/2024-07/NHyimage.png)If you are using the ABit License Scanner you can place the license on the scanner and all details and a copy of the image are extracted and stored.
Edit entry Double click on an entry to make changes [](https://help.abitsystems.com.au/uploads/images/gallery/2024-07/T4uimage.png) ### Move entry Move the mouse of an entry until the icon changes into 4 arrows. Hold down the mouse button and move the entry. [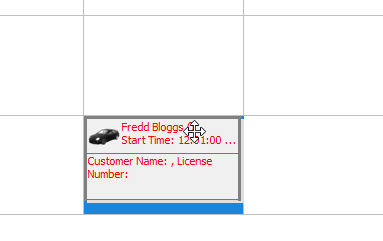](https://help.abitsystems.com.au/uploads/images/gallery/2024-07/1Rkimage.png) # Loan car form If a Loan Form has been configured in Loan Car Maintenance the form can be printed from the Loan Form button. The Loan Form will fill in the required fields and be displayed in Microsoft Word.Workstations will require Microsoft Word for this feature to work
[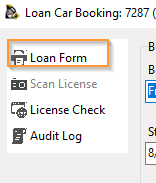](https://help.abitsystems.com.au/uploads/images/gallery/2024-07/9eJimage.png) 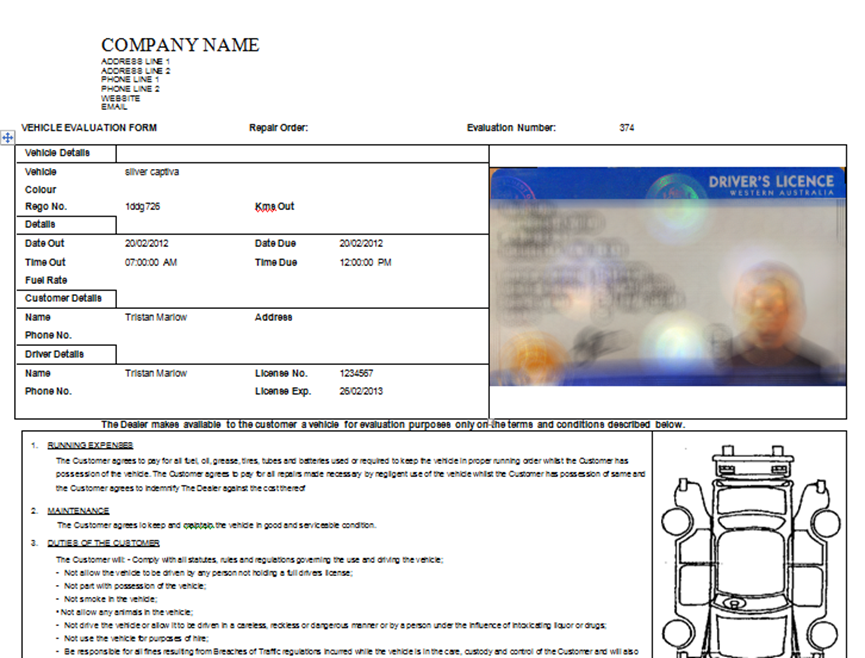 # Loan car diary administration ### Creating, editing or deleting a loan carNOTE: Deleting a loan car that has history is not recommended. Set the vehicle to inactive
[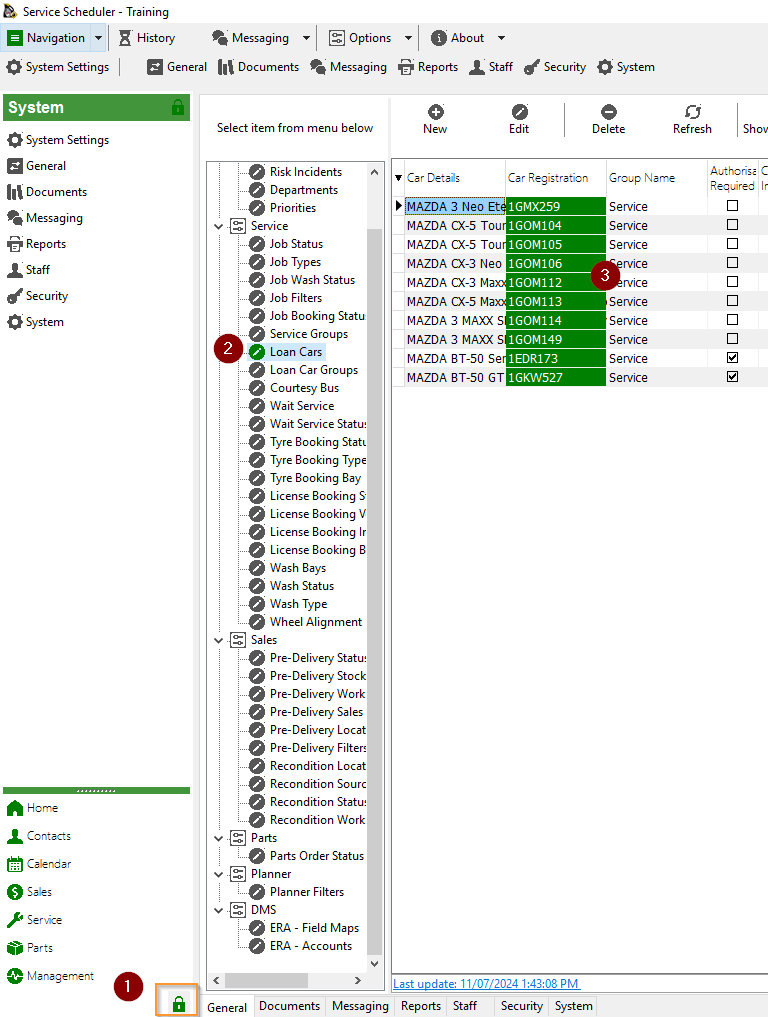](https://help.abitsystems.com.au/uploads/images/gallery/2024-07/Sllimage.png) Create a new or edit existing vehicle [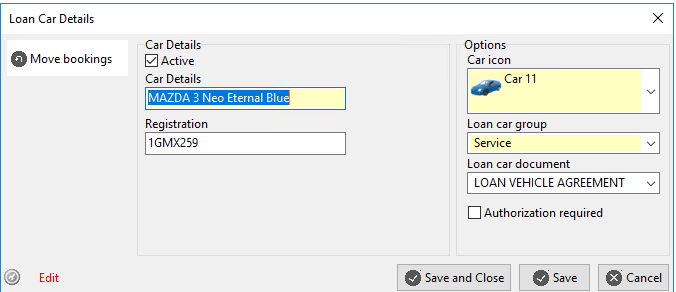](https://help.abitsystems.com.au/uploads/images/gallery/2024-07/OSSimage.png)| Active | Is vehicle available in the calendar | |
| Authorization required | To add or edit a booking a password is required | The password is specified in [system settings](https://help.abitsystems.com.au/books/service-scheduler-administration/page/system-settings "System settings") loan\_car\_override |
| Field name | Description |
| :customer\_name: | Customer name |
| :ro\_number: | Repair Order Number |
| :customer\_license\_number: | Drivers license number |
| :customer\_license\_expiry\_date: | License expiry date |
| :car\_details: | Vehicle Description |
| :booking\_start\_date: | Booking start date |
| :booking\_end\_date: | Booking end date |
| :booking\_start\_time: | Booking start time |
| :booking\_end\_time: | Booking end time |
| :car\_registration: | Vehicle Registration |
| Key | Description |
| loan\_car\_calendar\_days | Number of days to show on the loan car calendar (eg 5 or 7 days) |
| loan\_car\_delete\_password | The password used to delete an entry |
| loan\_car\_override | The password use to modify bookings on a vehicle with [](https://help.abitsystems.com.au/uploads/images/gallery/2024-07/G9Himage.png) checked |
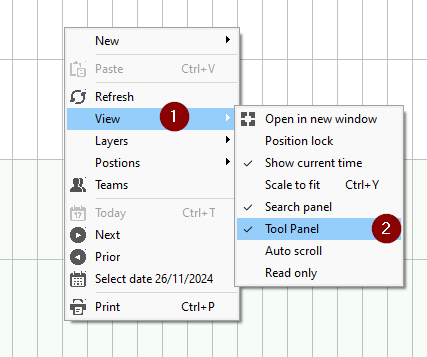
If the tools menu is missing, right click on the planner grid and select View -> Tool panel
[](https://help.abitsystems.com.au/uploads/images/gallery/2024-11/P5pimage.png) # User interface Navigation and toolbars| Toggle navigation | ALT + F1 |
| Toggle toolbars | ALT + F2 |