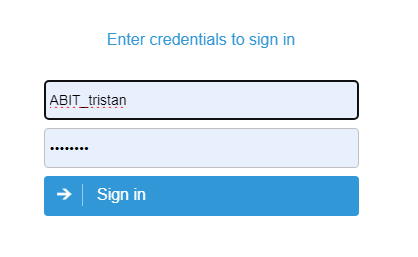
| Web hosted login | Microsoft SSO | Local or LDAP |
| [](https://help.abitsystems.com.au/uploads/images/gallery/2025-01/lJ7image.png) | [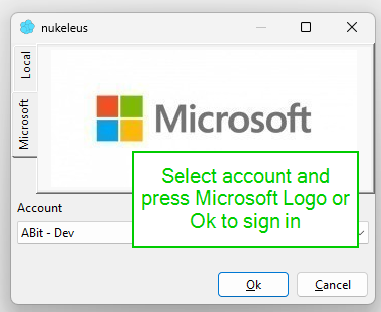](https://help.abitsystems.com.au/uploads/images/gallery/2025-01/kfPimage.png) | [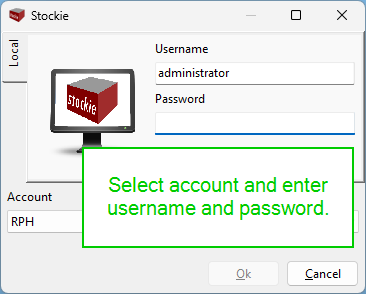](https://help.abitsystems.com.au/uploads/images/gallery/2025-01/6aXimage.png) |
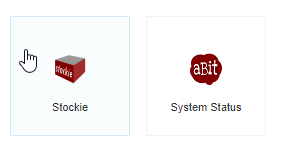
| After login, select "Stockie" | Login to Microsoft Entra | Login complete |
| [](https://help.abitsystems.com.au/uploads/images/gallery/2025-01/I10image.png) | [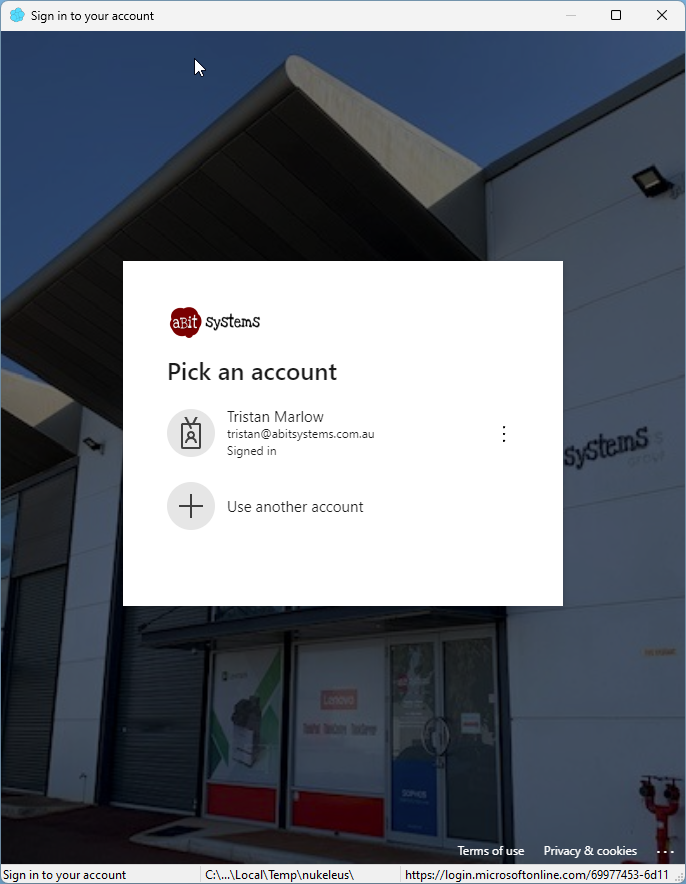](https://help.abitsystems.com.au/uploads/images/gallery/2025-01/3IUimage.png) |
When columns are moved, resized or hidden this applies only to the current user each user can have a unique display.
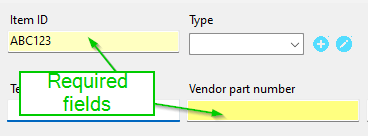
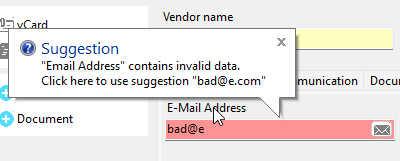
[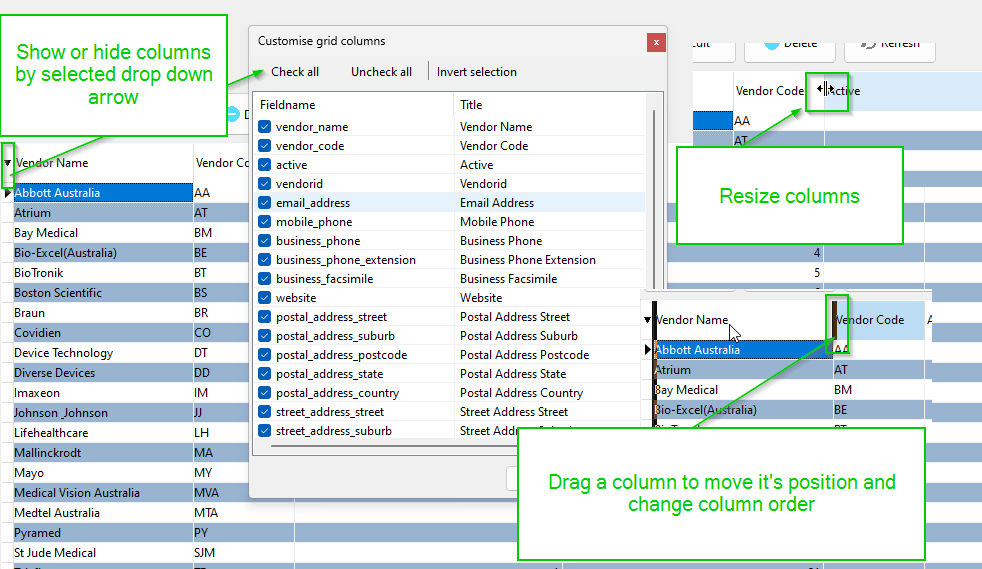](https://help.abitsystems.com.au/uploads/images/gallery/2025-01/4nFimage.png) Grid footer options [](https://help.abitsystems.com.au/uploads/images/gallery/2025-01/baZimage.png) ### Search panels When a search panel is available it will allow quick search of information. The panel may also automatically search when fields are modified. [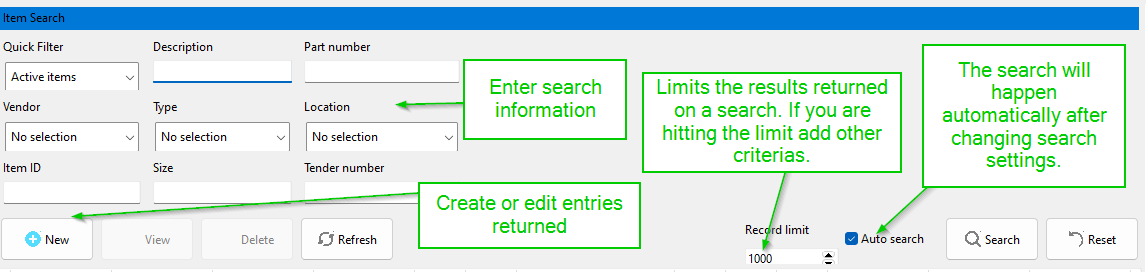](https://help.abitsystems.com.au/uploads/images/gallery/2025-01/siXimage.png) ### Creating new entries [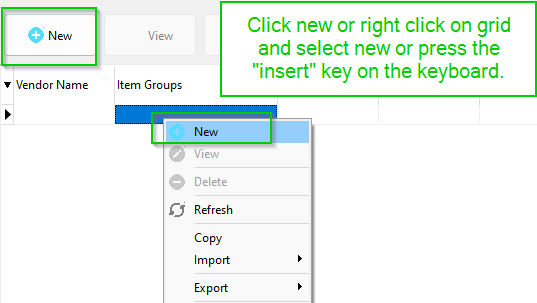](https://help.abitsystems.com.au/uploads/images/gallery/2025-01/rI7image.png) ### Editing existing entries [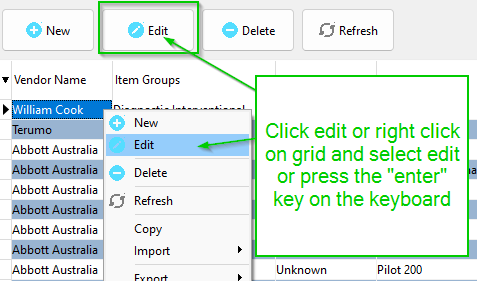](https://help.abitsystems.com.au/uploads/images/gallery/2025-01/2Vrimage.png) ### Refresh data [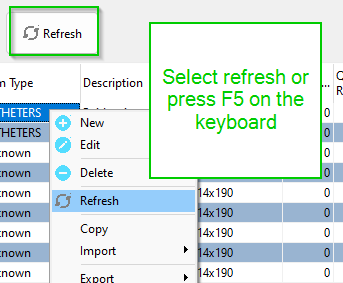](https://help.abitsystems.com.au/uploads/images/gallery/2025-01/KLGimage.png) ### Spell checking Many controls will underline words that contain mistakes. Right click on the word to fix the spelling mistake or add the word to your custom dictionary. Pressing F7 will also trigger a spell check.| [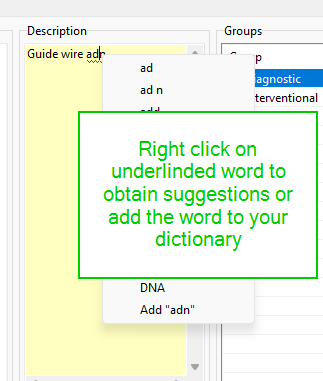](https://help.abitsystems.com.au/uploads/images/gallery/2025-01/pVWimage.png) | [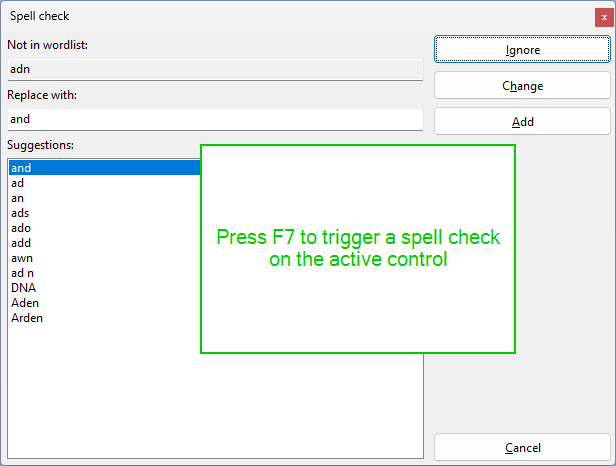](https://help.abitsystems.com.au/uploads/images/gallery/2025-01/eoQimage.png) |
| [](https://help.abitsystems.com.au/uploads/images/gallery/2025-01/vhHimage.png) | [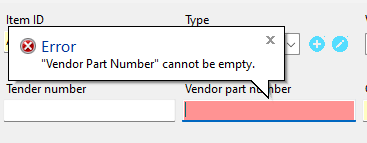](https://help.abitsystems.com.au/uploads/images/gallery/2025-01/spEimage.png) |
| [](https://help.abitsystems.com.au/uploads/images/gallery/2025-01/EIyimage.png) |
NOTE: Only stocktake can be active but you can close and resume the stocktake until it is closed or cancelled.
### Add items to stocktake Add items to the stocktake and update stock values [](https://help.abitsystems.com.au/uploads/images/gallery/2025-01/HCAimage.png) Option to bulk add items [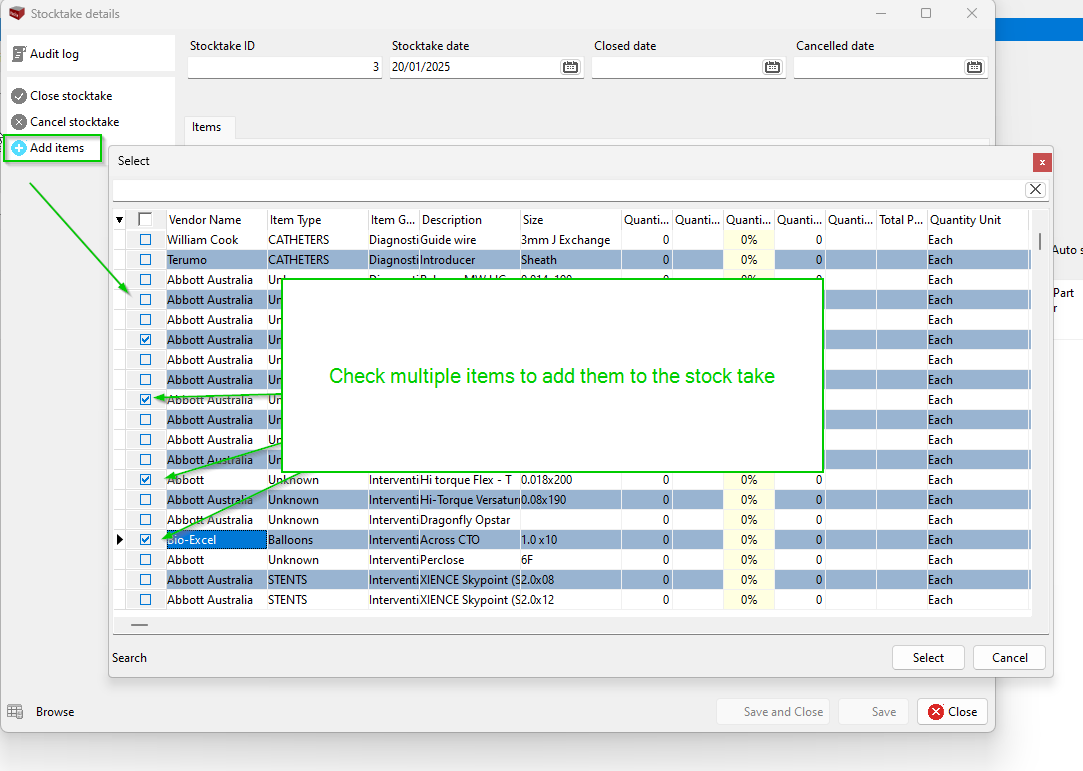](https://help.abitsystems.com.au/uploads/images/gallery/2025-01/vrfimage.png) ### Close a stocktake Closing a stocktake will apply the new stock levels and close the stocktake. [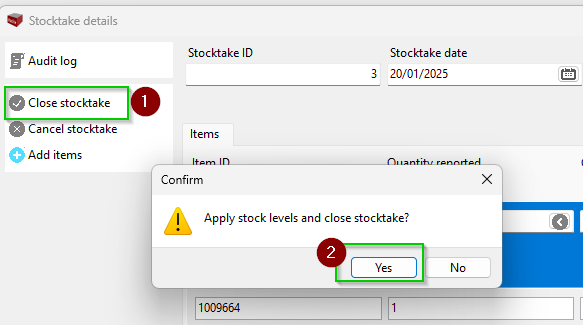](https://help.abitsystems.com.au/uploads/images/gallery/2025-01/hTMimage.png) ### Cancel a stocktake Cancelling a stock take will not apply any stock levels and close the stocktake so it is no longer available. [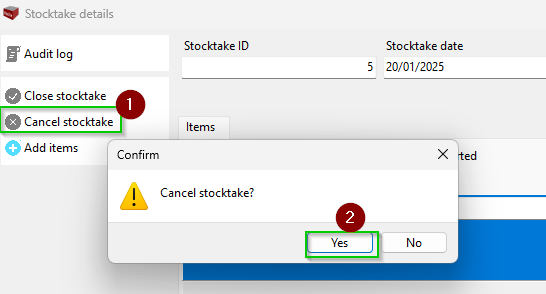](https://help.abitsystems.com.au/uploads/images/gallery/2025-01/UCjimage.png) # Ordering and receipt of items Select purchase orders from the navigation menu [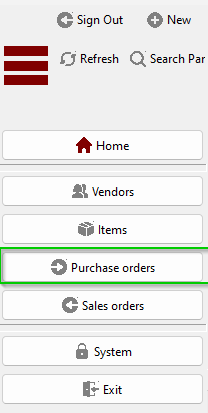](https://help.abitsystems.com.au/uploads/images/gallery/2025-02/image.png) ### Creating or editing purchase orders Search for existing or create a new entry [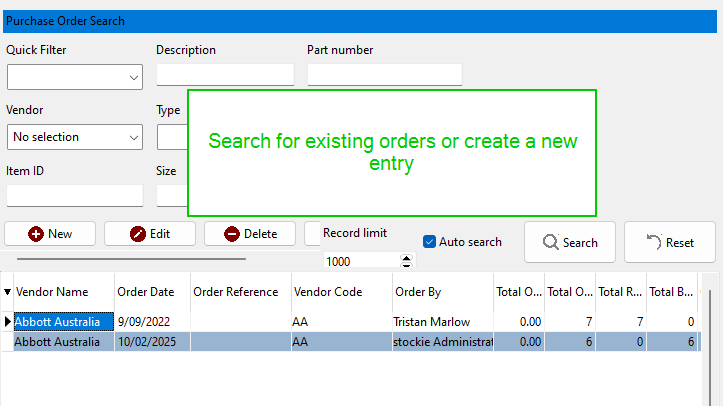](https://help.abitsystems.com.au/uploads/images/gallery/2025-02/rgkimage.png) Select vendor and add purchase order items [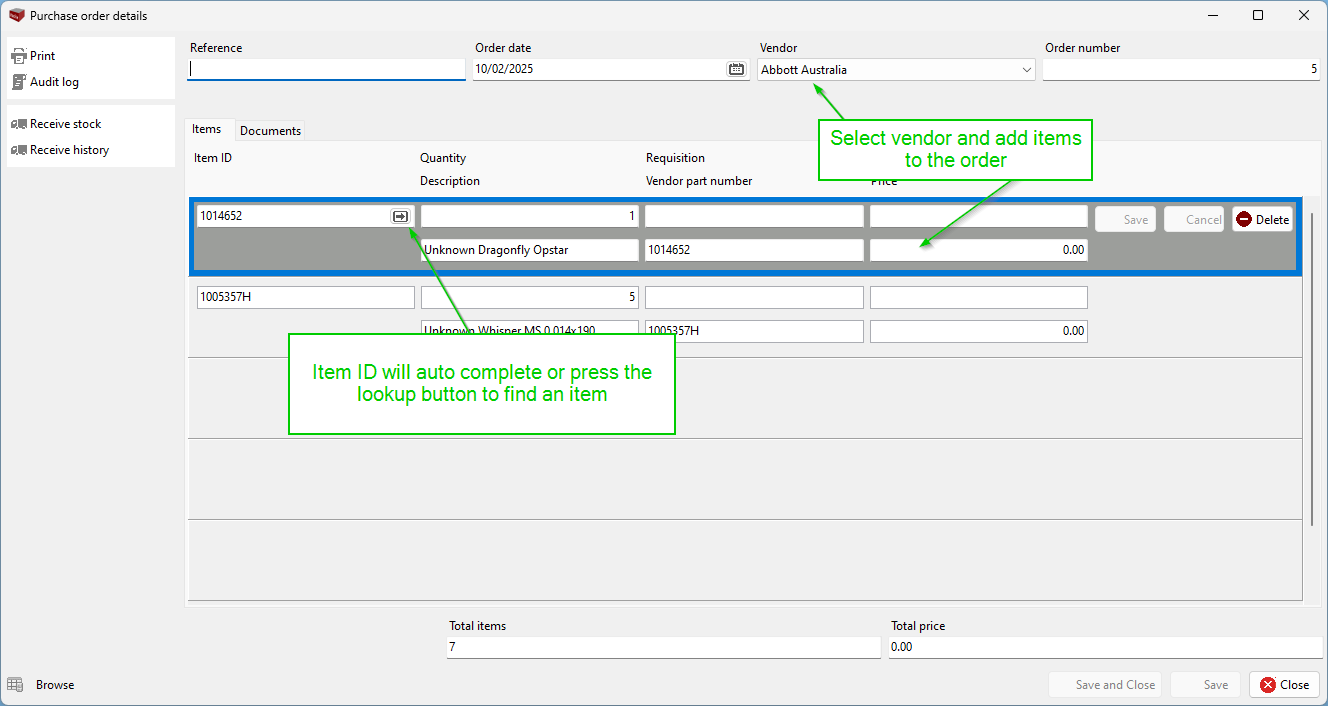](https://help.abitsystems.com.au/uploads/images/gallery/2025-02/NSVimage.png) #### Print purchase order [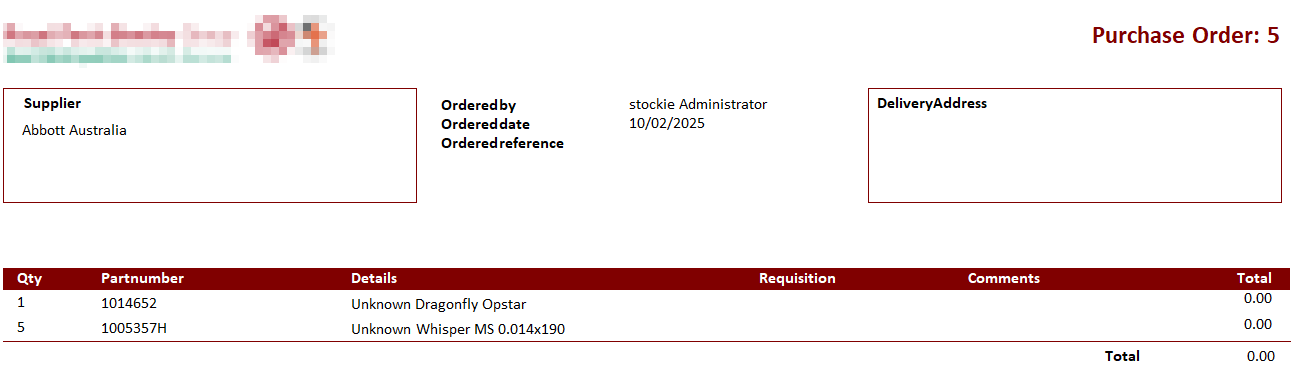](https://help.abitsystems.com.au/uploads/images/gallery/2025-02/hW5image.png) ### Receive stock When stock has been received locate the purchase order and select "Receive stock". Adjust the quantities that have been received. Clicking in the quantity field will automatically apply the back-order quantity, adjust this value as needed.Values less than the expected quantity will be highlighted yellow. Values high than the quantity will not be allowed.
[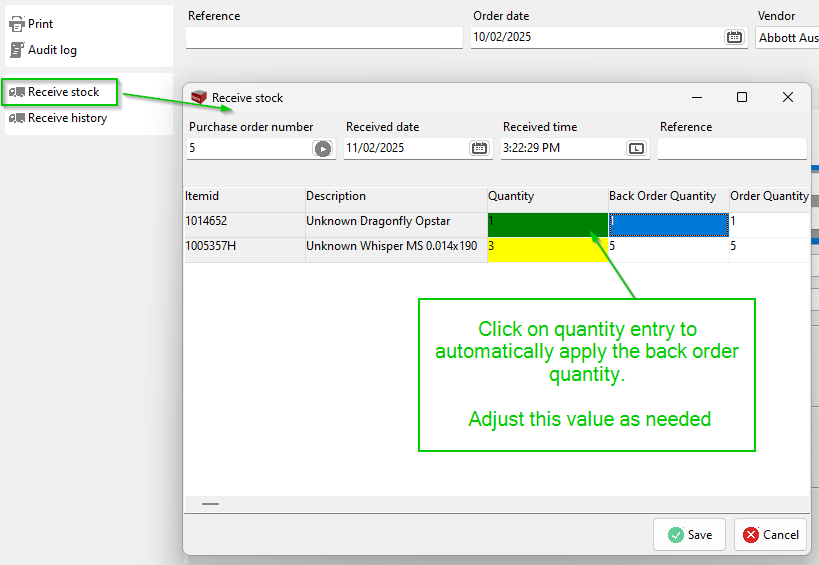](https://help.abitsystems.com.au/uploads/images/gallery/2025-02/VvWimage.png) If the order was incomplete and items are still on back order, when stock arrives press "Receive stock" again. Only the pending items will be displayed. [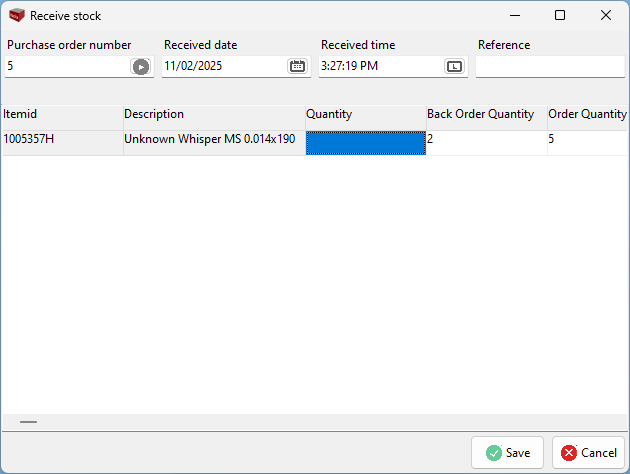](https://help.abitsystems.com.au/uploads/images/gallery/2025-02/lKzimage.png) ### Receive stock history Select Receive history to view stock receipt history. [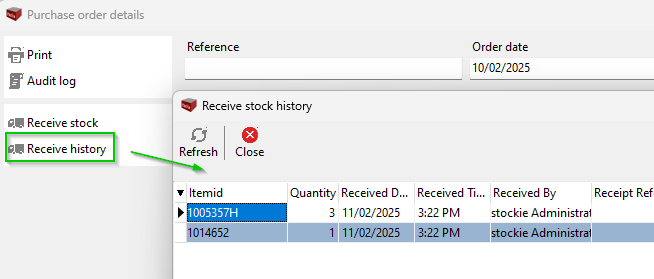](https://help.abitsystems.com.au/uploads/images/gallery/2025-02/pFximage.png) # Sales and picking items Select sales order [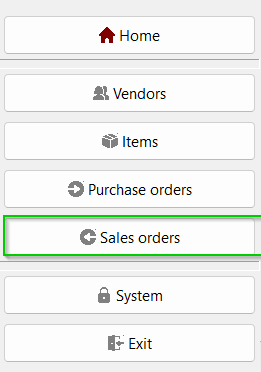](https://help.abitsystems.com.au/uploads/images/gallery/2025-02/YZIimage.png) ### Creating or editing sales orders Search for existing or create a new entry [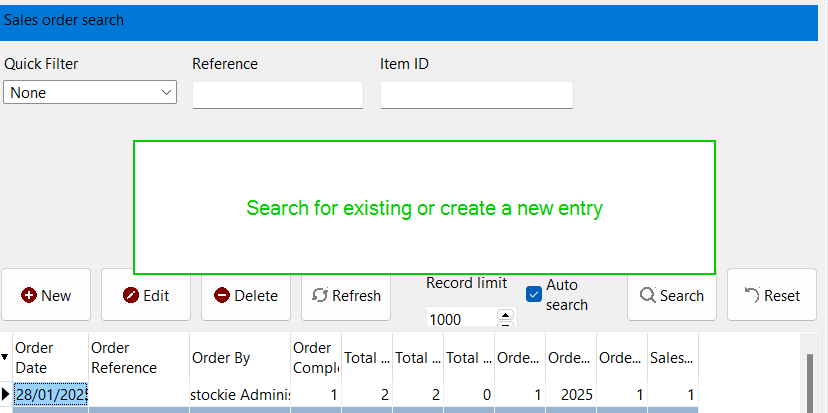](https://help.abitsystems.com.au/uploads/images/gallery/2025-02/uPAimage.png) Enter order details and items [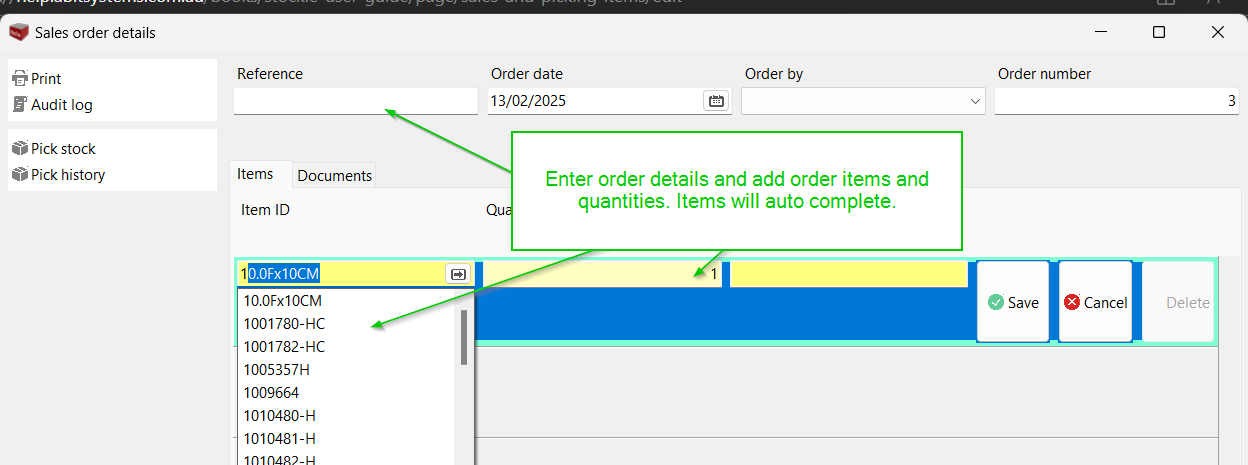](https://help.abitsystems.com.au/uploads/images/gallery/2025-02/Fl9image.png) #### Print sales order [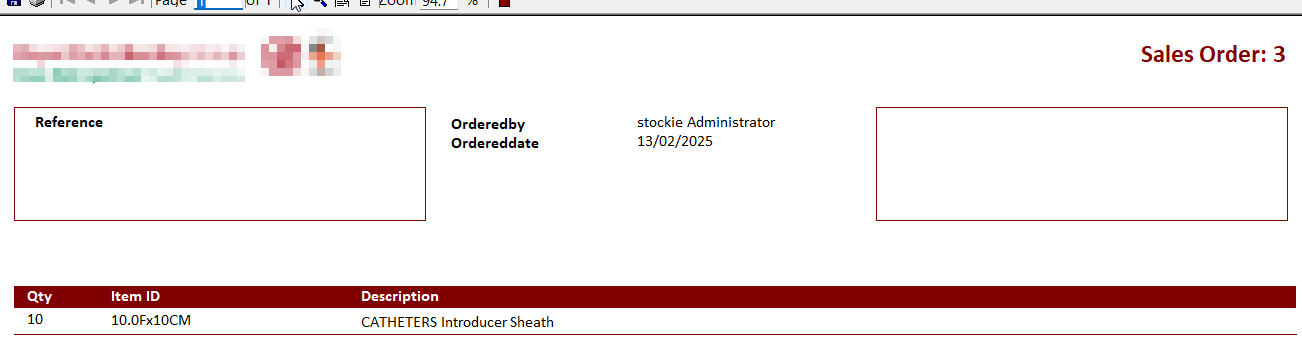](https://help.abitsystems.com.au/uploads/images/gallery/2025-02/4TKimage.png) ### Pick stock When stock has been picked Clicking in the quantity field will automatically apply the back-order quantity, adjust this value as needed.Values less than the expected quantity will be highlighted yellow. Values high than the quantity will not be allowed.
[](https://help.abitsystems.com.au/uploads/images/gallery/2025-02/dNAimage.png) If the order was incomplete and items are still on back order, when stock arrives press "Receive stock" again. Only the pending items will be displayed. [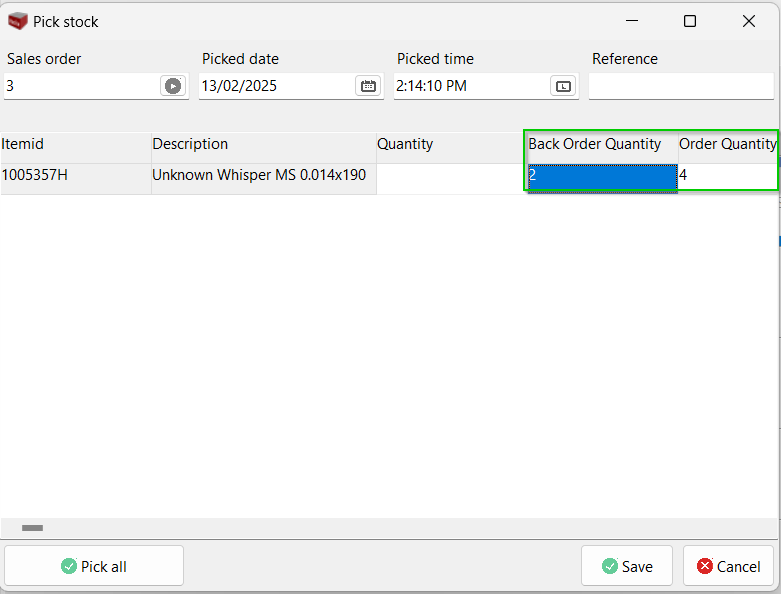](https://help.abitsystems.com.au/uploads/images/gallery/2025-02/uFGimage.png) ### Pick history Select Pick history to view picking list history. [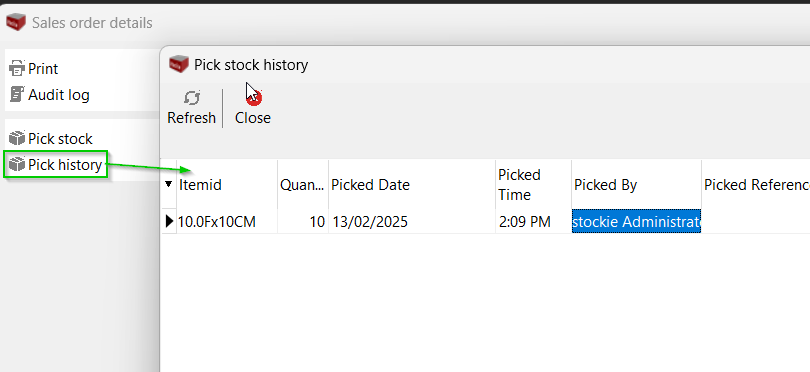](https://help.abitsystems.com.au/uploads/images/gallery/2025-02/iFeimage.png)